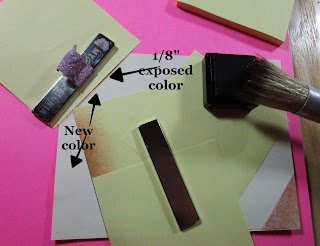
Retiform Part 1…
Finding ideas
to create a more masculine card front can be a challenge for most of us. I
know, as I’m one of those who lacks that imagination. (Most men do not want the dimensional flowers
that I love to create!)
While I was
pondering my most current male related challenge, a friend asked about the name of
a specific technique. Well, my old mind had one of those long "senior moments."
At any rate,
we finally determined that she was searching for the term “Retiform.” I remember trying to do a Retiform card a few months ago but was not satisfied with my
results. Like most of us, I really do not like not being able to accomplish
what should be easy. So, this week, I decided to relax and try again. I really
feel confident that this finished birthday card has been a successful challenge.
·
The
bird stamps are from Stampin’ Up.
·
The
sentiment was part of one of Whimsy’s Stamps, Paper Door collections.
·
All
the inks used are by Gina K.
·
Thank you for
stopping by today. Hope you check out Retiform Part 2.
Please remember: There are numerous
ways to achieve a Retiform card front. Mine is not the only way, nor will I
call it my original technique as this technique has been around longer than I
have.
Again, Thanks
for stopping by.
May God Bless
You always.


